I have a friend who is quite the Superman fan. I ordered this model, well, because it was cool; and decided to paint it up for him to put in his office. I mean, who doesn't want a 28mm Superman protecting your office from evil?
Packaging:


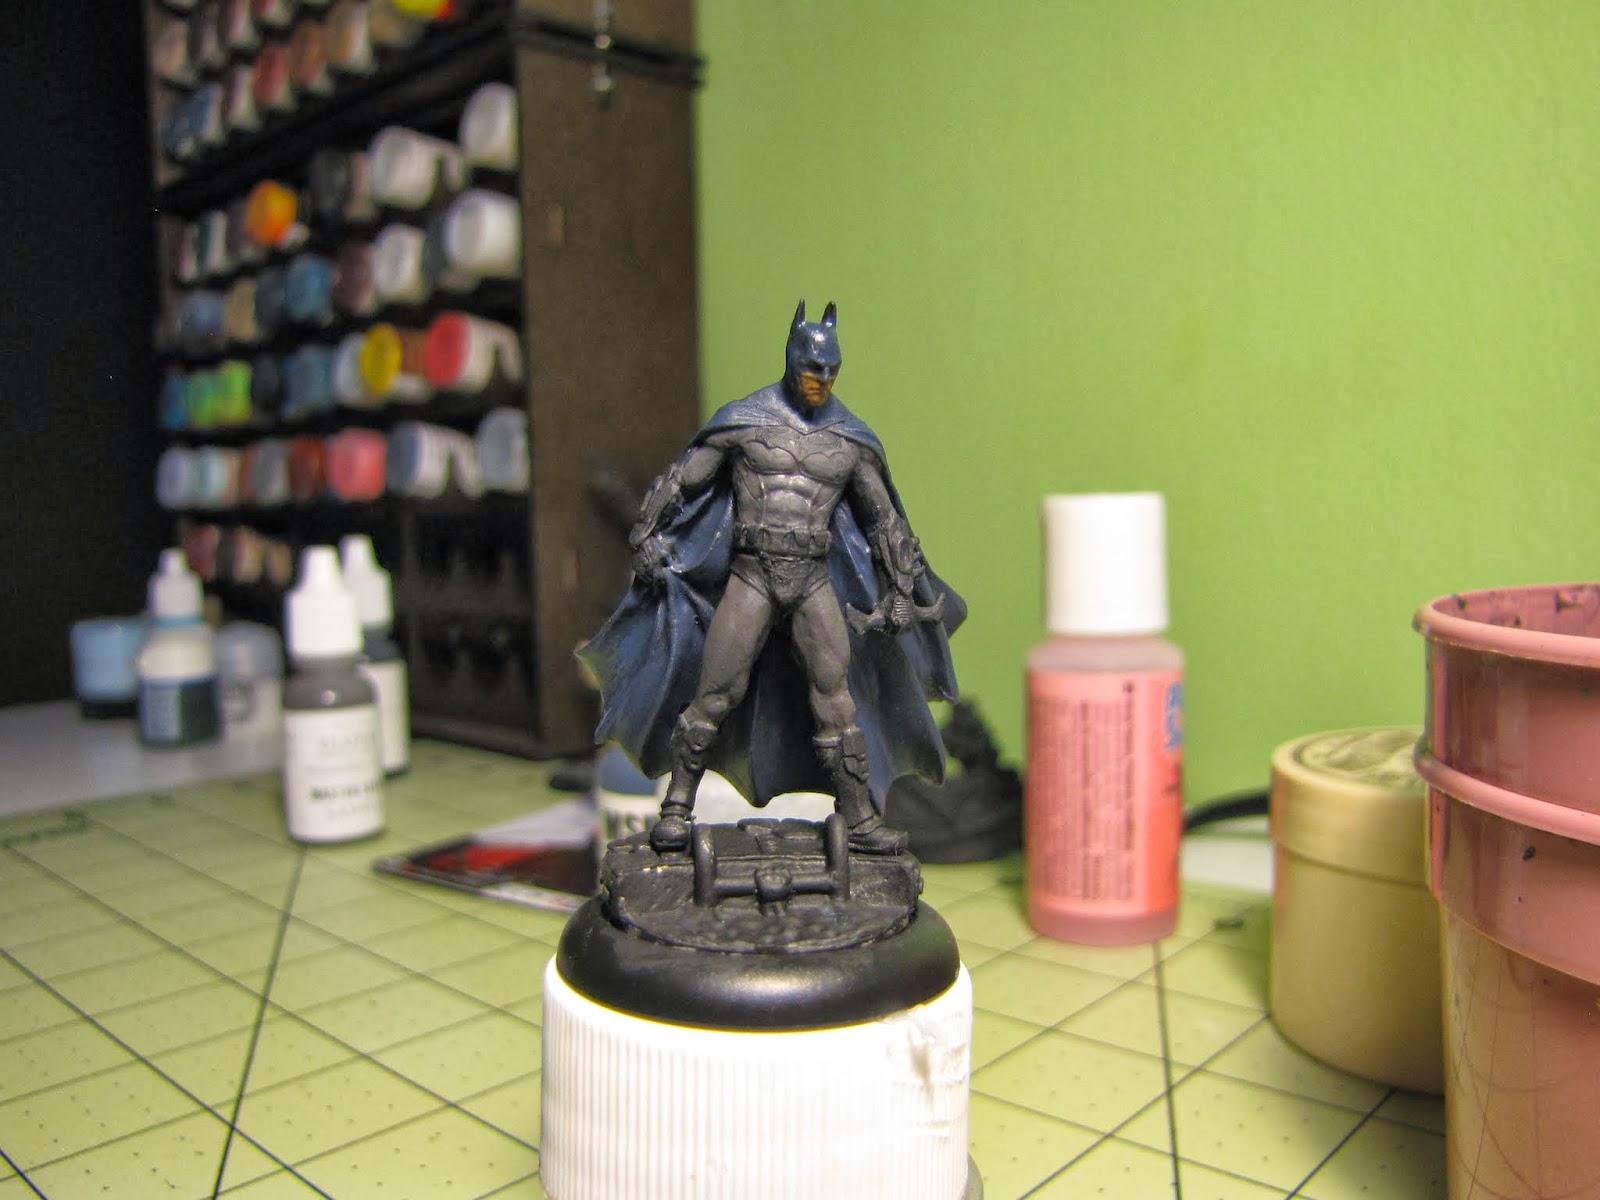
Essentially, I superglued it together. Didn't pin it. Probably should have, but we'll find out the hard way if I needed to. I used GW's Liquid Green Stuff to fill in the cracks. (Note: My LGS is was bought when that junk hit the market and guess what? It's mainly dried unusable plastic. I was able to get enough to do what I needed done, and tossed the pot. I think I'll just get some real Green Stuff next time I'm out shopping.) The base is the one that came with the model. A basic round lipped base and I stuck it on top of a larger basic round-lipped base to give it a pseudo-plinth feel. After other pre-painting prep: filing/cutting off flash and mold lines, I brushed on Reaper Master Series Sealant to fill in the one or two air-bubbles on the cloak. (A Reaper demo-painter hinted up to do so, but I think I'm supposed to do it after the primer…just take a bit of the clear coat on a toothpick and fill that pit, then brush a thin layer on and you get a super smooth base to lay paint down upon.)


Next, I primed ole Supes with Reaper Master Series Brush on primer, black.
Base coated his skin with RMS Rosy flesh, thinned a little with water. I then used RMS Rosy Shade to darken shade. Not dark enough so I pulled out the Vallejo Game Ink Flesh Wash. Put two drops of that with the two drops of Rosy Shade added two drops of Vallejo Glaze Medium and voila! I made an orangey mess of the skin. Not happy with that Flesh Wash. I then pulled out the Vallejo Sepia Wash and slapped that on there quite haphazardly. Now I have this:
A few things to note: 1) I know it's not in focus and I'm not bothering retaking a clearer picture of this orangish brownish mess; 2) What skill I deluded myself into having is now 3) 2+ years out since using a brush. I'm trying not to have to strip so I think I'll start with Rosy Shade instead of the mid tone of this triad, drop a meticulously placed wash of Vallejo Sepia Wash, then build up some subtle highlights.
Obviously, my knowledge far surpasses my actual skill. I took approximately 10 hours over a week's period and did various coats with RMS Rosy Shadow, maybe with a drop or two of Vallejo Glaze medium, then added a drop or two or four of Vallejo Sepia Shade wash. Didn't like it so wash with the old school "almost never go wrong" Citadel Devlin Mud wash. Too dark. Back to Rosy Shadow +glaze to thin, light layer of Devlin Mud, rosy shadow, highlighted with Rosy skin, mix a little devlin mud with the sepia shade…and so forth until I get the result in the below pic.
Not overly happy with the skin, but I'm going to leave it alone for a bit, and per the pic, you can see I moved on. (Still need to do the eyes and may had a little something to the rosy skin to give the lips a little color…but knowing me I'll have him looking like he's wearing Lois' lip stick.
So formula for yellow: I started with RMS Marigold yellow, and it crackled when dried. I thinned down VGC Moon Yellow with the Glaze Medium and covered the Marigold Yellow. (Hid the crackle, yes!) Dropped a thinned down Sepia Wash on the yellow to draw the "hard line" between the yellow and the "S". Brought the color back up with VGC Moon Yellow and the gave it a couple of washes with Secret Weapon Miniatures Yellow Snow wash. (loving SWM stuff, need more colors though.) Now onto the red, also shown in the above photo.
I started with the "S" and moved to the boots. I wanted to attempt to get the formula ball parked if not down pat prior to doing the cape. I based them with RMS Blood Red, Citadel Baal Red wash, Devlin Mud wash, then a wash of them mixed. I started bringing the red back to bright with a couple of layers of RMS blood red again, thinned with medium. Added a drop of RMS Fire Red. Then fire red thinned. Another Baal Red wash. Lastly, a very pointed and purposeful application of Devlin mud to outline the soles of his boots and this little lip thingy where the boots meet the suit.
I started on the blue of his suit.
This photo is too dark, but all I've done is base paint the blue with RMS Breonne Blue and lay down a wash of Citadel Asurmen Blue. I like this plain Jane effect and may just do another wash of Asurmen Blue and be done with it. Another thing I've noticed though is how "one-dimensional" his "S" is and want to fix it. Problem with that is my mediocrity of painting often ruins what I've already done. I might attempt to pull out my TAP "Insane Detail" brush and pick out some more depth with a pointed wash, and then try to layer on another highlight. Maybe, maybe not.

Oh the horror of his eyes. I place these pics on here "x-large" so I can see what I've really done, but holding him a little further away there's a bit of depth on the "S" and I did one more highlight glaze in the middle of it. I've done more layering on the blue and my steps go a little something like this after the initial base of RMS Breonne Blue: Citadel Asurmen Blue x2, layer of Secret Weapon Miniatures Blue-black to get more depth (too dark now!), Breonne/glaze medium, layer of RMS Templar blue with 3 drops of medium (too thin! almost did a reverse shading where the recesses were lighter than the highlighted areas1), hit with a thinned Asurmen blue, then layered up starting with 1:1:1 ratio of Breonne, Templar, and Medium, then 1:1 templar and medium. While not a Golden demon winner, I'm actually pleased with the results. I can do better with practice, but now I think I'll leave the blue alone.


I'm actually more than well pleased at how the cape turned out. (You can see the blue a bit better in these pics too.) Built up about 5-6 thin layers of RMS Blood Red, then hit with two Citadel Baal Red washes. I didn't feel the need to go with the Devlan Mud wash the time. Then picked up some of the highlights with the Blood Red in a 1:1 ratio with Medium, added a drop of RMS Fire Red for more highlights, then another drop of RMS Fire Red, and left the cape alone.
Black isn't really in my skill set, but his hair was based with P3 Thamar black, dry brushed with a Reaper Sample given to me out of one order (the one on the far left of the picture below). Then washed with SWM Blue Black. Not awesome, but there's some depth not captured with my pics.
The grey of rock base was made from two different shades of grey from samples given from RMS when I placed some orders. Based with the darkest, dry brushed with the mid-tone, and a lighter dry brush with the RMS ghost white. I included pics to show the make shift triad.
I flocked the base with basic flock. Took some Elmer's clear glue, mixed it in water, brushed it on the base, and dipped it in the tupperware of flock. (I'm not a big/huge creative basing guy…I'll come around eventually. Lastly, final pics:
Oh, and I hit it with Reapers Brush on sealer. It gave it a slight shine and normally I'd bust it down with a spray on matte varnish, but I'm out and it's not crazy shiny under normal lighting conditions. Thanks for looking.